
Home Art Fun Series
FOSSIL PRINT & clay LEAF BOWL
Make your own fossil imprint or custom leaf bowl with air dry clay to hold your favourite knick-knacks in style.art & PALEONTOLOGY
One of my go-to sources of inspiration is always Mother Nature! I start planning many of my lessons by looking at the natural world.
Paleontology includes both biology and geology as scientists work to parcel together ancient history buried in stone about organisms, environments and ancient climates. On top of being chock-full of invaluable evidence about our world, it can also be incredibly beautiful! Explore more pieces of imprinted history at the American Museum of Natural History.
I've always loved fossils and the stunning impressions they have left behind. So we are combining these ancient details with new designs for these two fun projects.
How do the patterns around you influence your art?
WHAT YOU'LL NEED
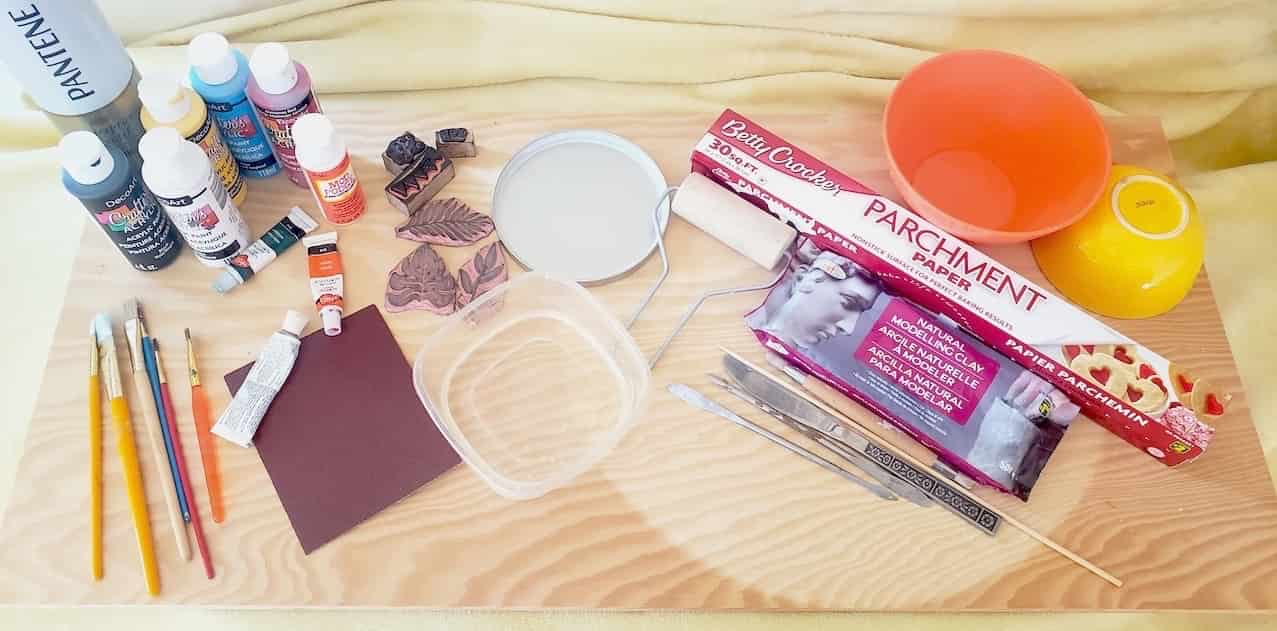
- Air-dry clay
- Clay tools or a butter knife
- Stamps (or create your own)
- Bowl for mould
- Container with water
- Sand paper
- Paper towel or a cloth
- Mod Podge (hairspray can also act as a sealant)
- Assorted acrylic paints
- Assorted paint brushes
- Optional: Parchment paper, vaseline, toothpick, sponge, toilet paper/paper towel roll, scissors
WHAT to do
FOSSIL BOWL
We recommend putting down a piece of parchment paper to work on so you can easily peal off your clay from the surface and to keep your work area clean.
1. Tear off a hunk of your air-dry clay and roll it into a ball.2. Press down onto your ball to flatten it. Then use a rolling pin (you could also use a cup) to roll out your clay so it is smooth and even.Your clay should be roughly 1cm thick.
3. Place a bowl or plate on top of your rolled out clay.4. Use a clay tool or butter knife to trace around the bowl. Remove the excess clay.
NOTE: Keep your excess clay on hand. We'll use it to make our second bowl.
5. Grab your stamp and gently press it in your clay. Repeat to cover the entire surface area.
Don't press too hard into your clay. It will be difficult to pull off your stamp if you press in too deep and may tear your clay.
6. Lightly wet your fingers and gently smooth your impressions in the clay.
EXPERIMENT WITH PATTERNS & DESIGNS
We are using our own hand-carved stamp, but any stamp will work. If you don't have a stamp on hand, you could also use a marker lid or any other tool to make an impression.You could also try using multiple stamps in different shapes.Get creative!
7. Now it's time to grab your bowl mould. Spray your bowl with hairspray or cover in vaseline so it will be easier to remove your bowl later on.
8. Take your clay and place it inside your bowl mould. Gently push your clay against the bowl to form the bowl shape.
9. Use a clay tool or butter knife to cut the top of your clay to give a clean bowl edge.
PRO TIP: Use a clay tool or toothpick to help re-outline or touch up any imprints in your clay that may have been altered or smushed when placed into the mould.
10. Leave your bowl to dry for up to 24 hours. Our Dollarama clay turns white when it is dry.
CLAY LEAF BOWL
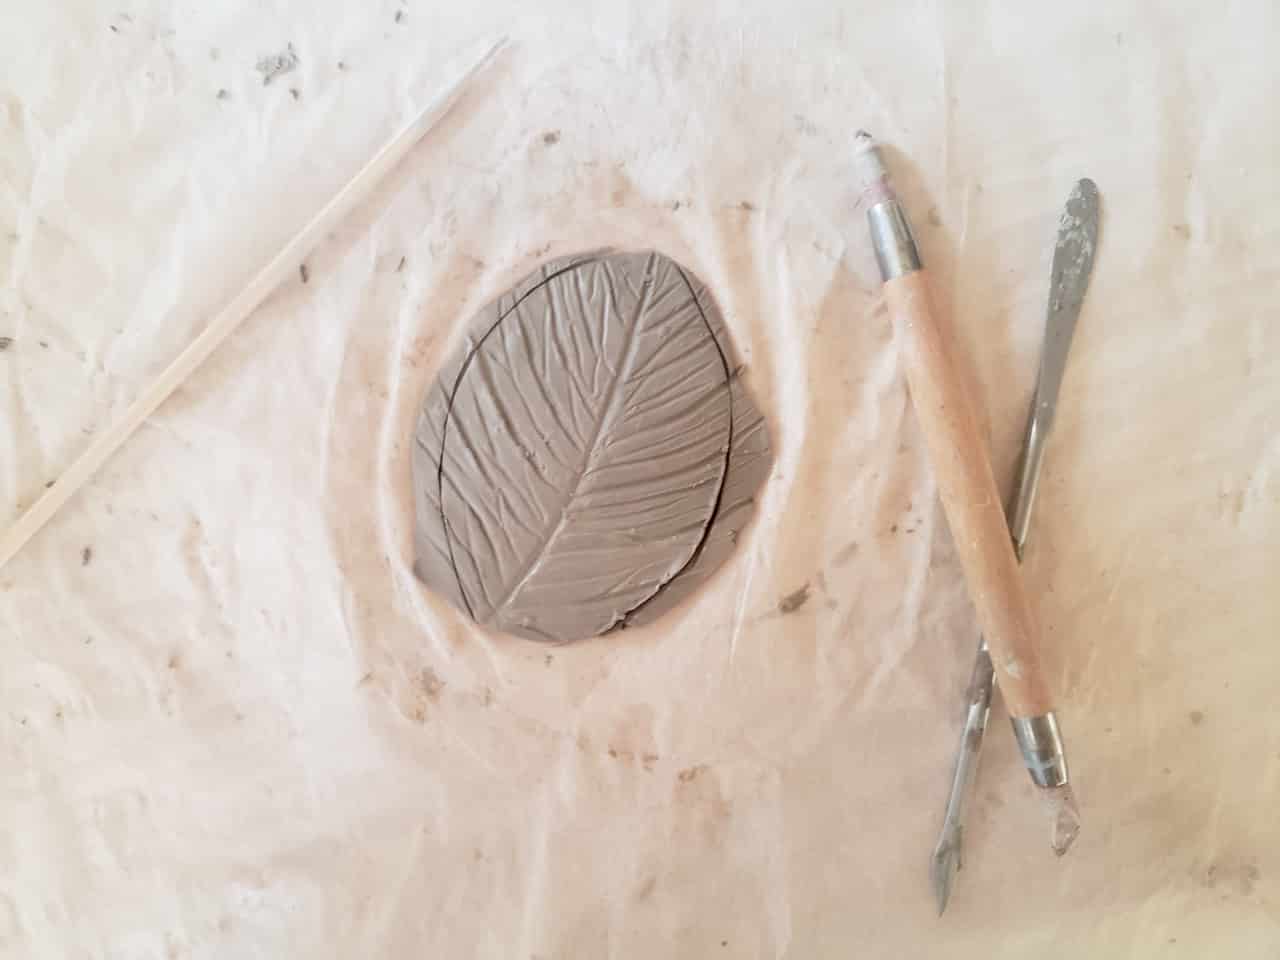
1. Take the leftover clay from your first bowl, and flatten it onto the table. Use a rolling pin or cup to roll out evenly.
2. Using a clay tool or butter knife, cut out a simple leaf shape in your clay.
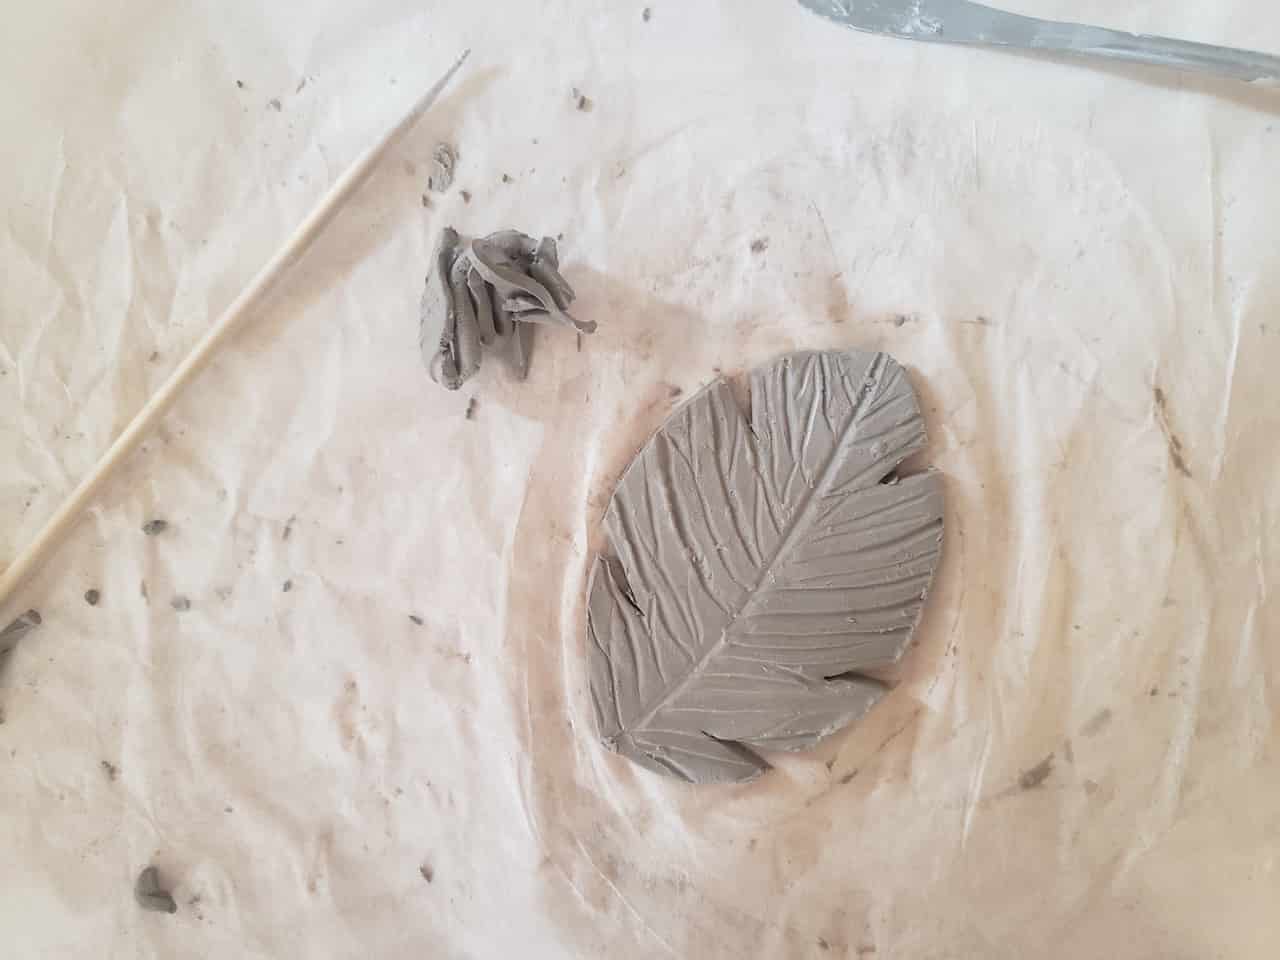
3. With a clay tool or toothpick, create leafs veins in your clay. Use some water to smooth out your lines.
4. Make your leaf even more dynamic by cutting out some triangles that line up with your leaf veins.
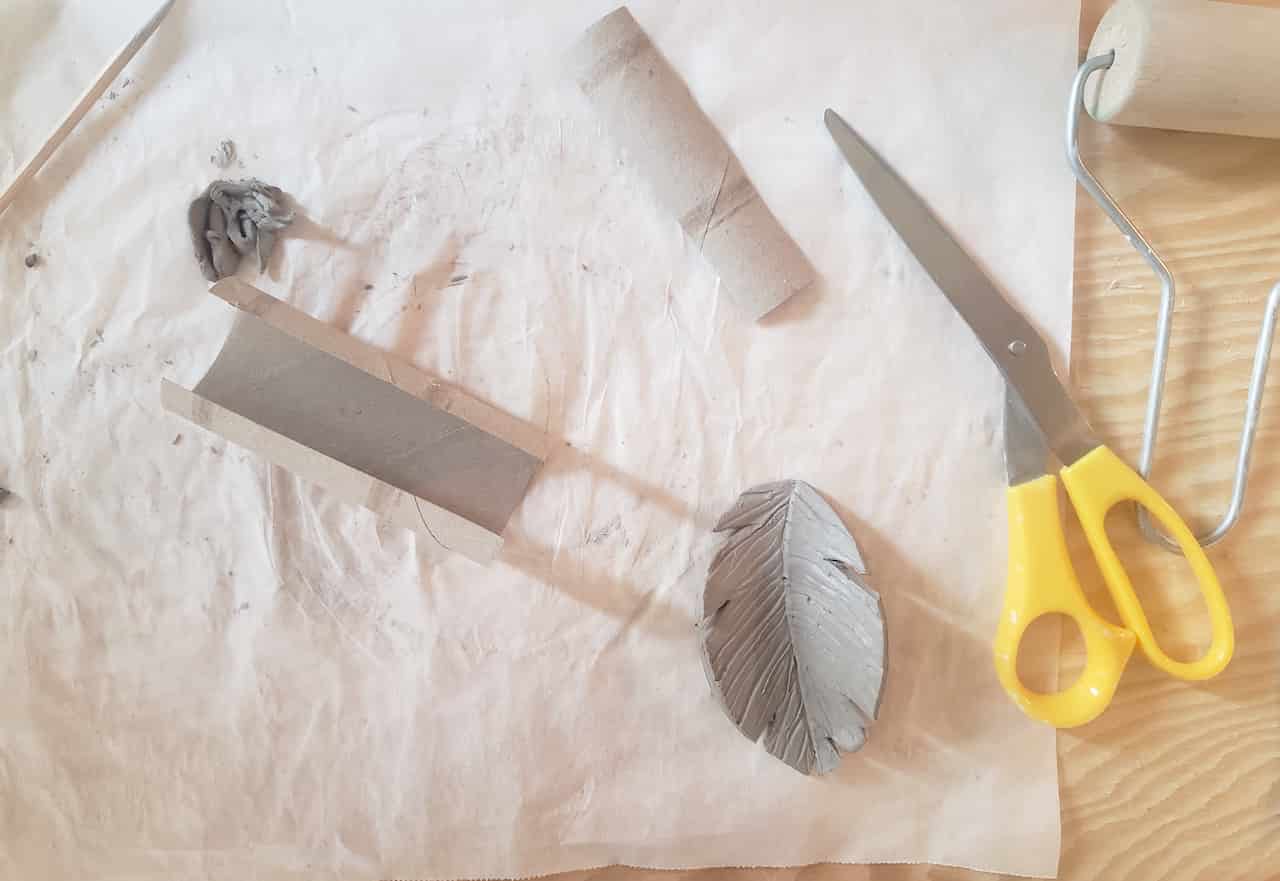
5. Lift the clay and pinch your leaf as if you were holding a taco to give it a 'spine.'
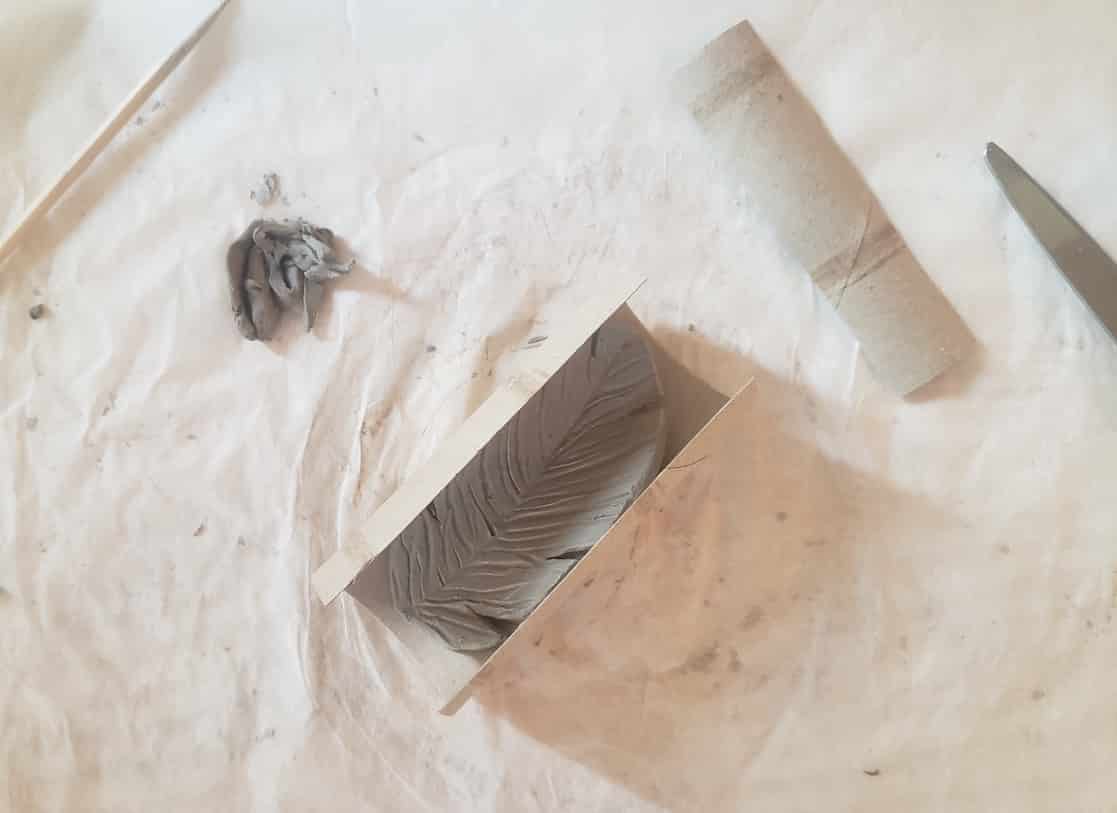
6. Take a toilet paper or paper towel roll and use scissors to cut out a strip. Place your leaf inside the roll to help maintain shape while it dries as shown below.
7. Leave your clay to dry for up to 24 hours.
PAINTING YOUR BOWLS
1. Once your bowls are dry, remove them from their moulds.
Caution: Be gentle when removing your bowls. Push on one side of your bowl to release from the form. Do not bang your bowl upside down to try and free the clay. Try to gently pry one side lose. If you used enough vaseline or hairspray, the bowl should free easily with a little pressure.
2. Use sandpaper to lightly sand your bowl, paying careful attention to cleaning up edges, but don't press too hard. Skip this step if you experimented with playdough.
3. Use a sponge to remove clay dust or wipe the bowl with a wet paper towel if you don't mind waiting a few minutes for the clay to dry again.
4. Start by priming your bowls with white acrylic paint on both the inside and outside of your bowls. Air-dry clay will absorb the paint quickly, but still wait a minute or two before painting the outside or vice versa.
5. To create depth and layers, we are going to start with paint washes to achieve our desired effect. Start with your base colour (we chose green) and mix in a lot of water, almost as if you were using watercolours.
Brush on your diluted paint, and let the paint settle into the natural crevices we have created in the clay.
Once the paint has settled, wipe away the excess paint using paper towel or a cloth.
6. Continue to use paint washes in different colours, letting each 'wash' settle into your designs before wiping away the excess.
For our bowls we did washes in the following order: green, black, dark green, yellow, and then white.
Note: Don't forget to paint the outside of your bowls. The paint washes won't be as effective as the outside isn't as textured. However, you'll still get some beautiful colour-mixing.
7. After your paint washes, use a dry brush or sponge to add pockets of colour for clarity.
For example, we used a dry brush to add back in some black to our veins for our clay leaf bowl. With our fossil bowl, we used a dry brush clean up our fossil imprints with white paint. For both bowls, we used yellow paint and a sponge to add little highlights in our designs.
8. After your paint dries, apply a layer of Mod Podge to your bowls for a nice gloss finish and seal. If you don't have any Mod Podge, hairspray will work as a sealant.
9. Now you have two adorable bowls ready for action!
